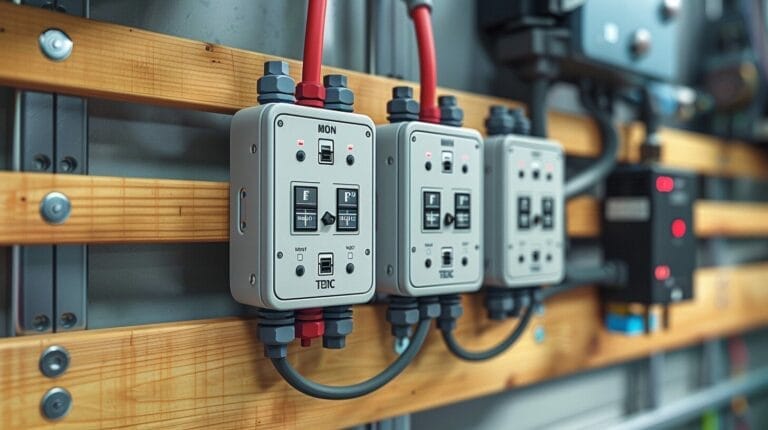
3 Black Wires Light Switch? Wiring Tips Here
When we encounter three black wires on a light switch, it’s crucial to understand their roles to guarantee a safe and functional installation. One wire brings power to the switch, another carries power to the light fixture, and the third connects multiple switches in the circuit. Misidentifying these can lead to malfunctions or safety hazards.
We’ll walk through the steps to correctly identify and connect each wire, as well as some advanced techniques for a secure setup. But first, let’s discuss the critical safety precautions we must take before starting any electrical work.
Key Takeaways
- Turn off power at the breaker before starting any wiring work.
- Use a multimeter to identify line, load, and traveler wires correctly.
- Ensure all wire connections are secure and properly tightened.
- Initiate a pigtail connection for a more reliable and organized setup.
- Test the switch after installation to confirm proper functionality.
Understanding the Basics of Electrical Wiring and Light Switches

A single pole light switch, the most common type, controls one light or fixture from a single location. Black wires typically carry the current from the power source to the switch and then to the light fixture. Recognizing these wires and their roles can help us innovate and upgrade our electrical systems safely.
Black wires are usually the “hot” wires, meaning they’re live and carry electricity to the switch. Understanding these color codes isn’t just about safety; it’s also about efficiency and innovation.
Identifying and Working with the 3 Black Wires in Your Light Switch

Exploring the complexities of a light switch with three black wires, we’ll concentrate on identifying each wire’s role to guarantee a safe and efficient setup.
Typically, they include:
- Line Wire: The source of power coming into the switch.
- Load Wire: Carries power from the switch to the light fixture.
- Traveler Wire: Used in multi-way switch configurations to connect multiple switches.
Understanding these roles is essential for both functionality and safety.
Always turn off the power at the breaker box before working with electrical wiring. Using a voltage tester can confirm the absence of live current, ensuring we don’t accidentally get shocked. Mark each wire with labels as you disconnect them from the old switch. This step helps avoid confusion during reinstallation.
Step-by-Step Guide to Installing a Single Pole Switch with 3 Black Wires

Let’s explore the step-by-step process of installing a single pole switch when you’re faced with three black wires. First, make sure the power is off at the circuit breaker. Safety is paramount. Unscrew the existing switch and gently pull it out from the electrical box to expose the black wires.
Next, identify the three black wires: line (incoming power), load (outgoing power), and a traveler or common wire. Use a voltage tester to confirm which wire is live. This step is essential for proper installation.
Now, let’s connect the wires. Attach the line wire to the common terminal on the single pole switch. Connect the load wire to one of the brass terminals. The traveler wire goes to the remaining brass terminal. Secure each connection by tightening the screws, making sure there’s no exposed copper outside the terminal.
Carefully tuck the wired switch back into the electrical box, securing it with screws. Replace the switch cover plate.
Troubleshooting Common Issues with a Single Pole Switch with 3 Black Wires

When dealing with a single pole switch with three black wires, we often encounter issues like misidentified wires or loose connections. Troubleshooting these problems requires a systematic approach, innovative thinking, and a keen eye for detail to guarantee a safe and functional switch.
First, it’s vital to identify the hot wire. This is often the root cause of many issues. Using a voltage tester, we can determine which wire carries the current. Once we’ve identified the hot wire, we should label it to avoid confusion.
Next, we need to make sure all connections are secure. Loose connections can lead to intermittent functionality or even pose safety hazards.
Here’s a quick checklist to help us stay focused:
- Double-check each connection: Ensure every wire is tightly wound and firmly connected to the switch terminals.
- Inspect for wear and tear: Old or frayed wires can cause poor conductivity and should be replaced.
- Test the switch: After securing all connections, test the switch to confirm that it operates as expected.
Advanced Tips and Techniques for Working with 3 Black Wires in a Light Switch

How can we effectively manage and connect three black wires in a light switch to guarantee both safety and functionality? Initiate a pigtail connection. This involves using a short piece of wire to connect the three black wires together, ensuring a solid, reliable connection.
Here’s a quick table to outline our steps:
| Step | Action | Tools Needed |
|---|---|---|
| Identify Wires | Use a multimeter to test wires | Multimeter |
| Create Pigtail | Connect wires with wire nuts | Wire nuts, pigtail |
| Secure Switch | Attach pigtail to switch terminal | Screwdriver |
Regularly checking connections ensures they remain secure. Loose connections can lead to faulty operation and potential hazards. Also, make sure to turn off the power at the breaker before working on any electrical setup to avoid accidents.
Conclusion
To sum up, by understanding the roles of the three black wires—line, load, and traveler—we can confidently tackle light switch installations.
Always remember to turn off the power at the circuit breaker and use techniques like pigtail connections for added safety.
With these tips, we’ll guarantee our electrical systems are both functional and secure.
Let’s keep learning and applying these best practices to make our projects successful and safe.
Frequently Asked Questions
Need help identifying 3 black wires on a light switch?
If you are confused about the wiring with 3 black wires, it’s important to first identify which wire is the hot wire. The hot wire is usually connected to the top screw on the switch. You can use a voltage tester to determine which wire is hot before proceeding with the installation.
What should I do if I removed the old switch and see 3 black wires?
If you have removed the old switch and are now faced with 3 black wires, you will need to properly identify the hot wire, neutral wire, and ground wire. The hot wire should be connected to the top screw on the new switch, the neutral wire (usually white) should be connected to the silver screw, and the ground wire (green or bare copper) should be connected to the green screw.
How can I wire a new switch with three black wires?
To wire a new switch with three black wires, you will need to create a pigtail. Connect the three black wires together with a short length of wire using a wire connector to create the pigtail. Then, connect the pigtail to the appropriate screw on the new switch.
I am confused about which wire goes where on the new switch with 3 black wires, can you help?
It is common to be confused when dealing with multiple wires on a switch. Remember, the hot wire usually goes to the top screw, the neutral wire to the silver screw, and the ground wire to the green screw. If you are unsure, it’s always best to consult a professional or visit websites like Doityourself.com for guidance.
Should I be concerned about the black wires being hot?
In electrical wiring, the black wires are often used as the hot wire to carry the current. It is important to always treat black wires as if they are hot and take necessary precautions when handling them to avoid electrical shocks or accidents.


