How to Remove a Nipple Light Fixture: DIY Home Improvement
Ready to upgrade your lighting fixtures? Our DIY home improvement guide walks you through the steps to remove a nipple light fixture with ease. From turning off power to disassembling the fixture, we provide clear instructions for a smooth removal process. Whether you’re replacing outdated fixtures or making room for a new design, follow our expert tips for a successful project in our How to Remove a Nipple Light Fixture guide.
Key Takeaways
- Turn off power at the circuit breaker for safety.
- Use a voltage tester to confirm no electricity.
- Remove screws holding the fixture in place.
- Safely disconnect wire connections.
- Carefully take down the nipple light fixture.
Understanding the Anatomy of a Nipple Light Fixture
A nipple light fixture, sometimes humorously referred to as a ‘boob light,’ is a type of flush mount light commonly found in many homes. Understanding the electrical aspects of this fixture is important before attempting to remove it. The fixture consists of a base attached to the ceiling, a central nipple that extends downward, and a rounded or domed light cover that diffuses the light. Knowing how the nipple light fixture differs from a recessed light is vital to avoid confusion during removal.
Pre-Removal Preparations: What You Need Before Removing a Nipple Light Fixture

To prepare for the removal of a nipple light fixture, it’s important to first put safety measures in place, collect the necessary tools, and prepare the surrounding area. Gathering the necessary tools beforehand will streamline the removal process and prevent delays. Additionally, preparing the area around the light fixture by clearing any obstructions and ensuring a stable working environment is essential for a smooth removal process.
Efficiently organizing these pre-removal tasks won’t only make the removal process safer but also more effective.
- Make sure safety precautions are in place
- Collect the necessary tools for the removal
- Prepare the area around the light fixture
- Create a stable and organized workspace
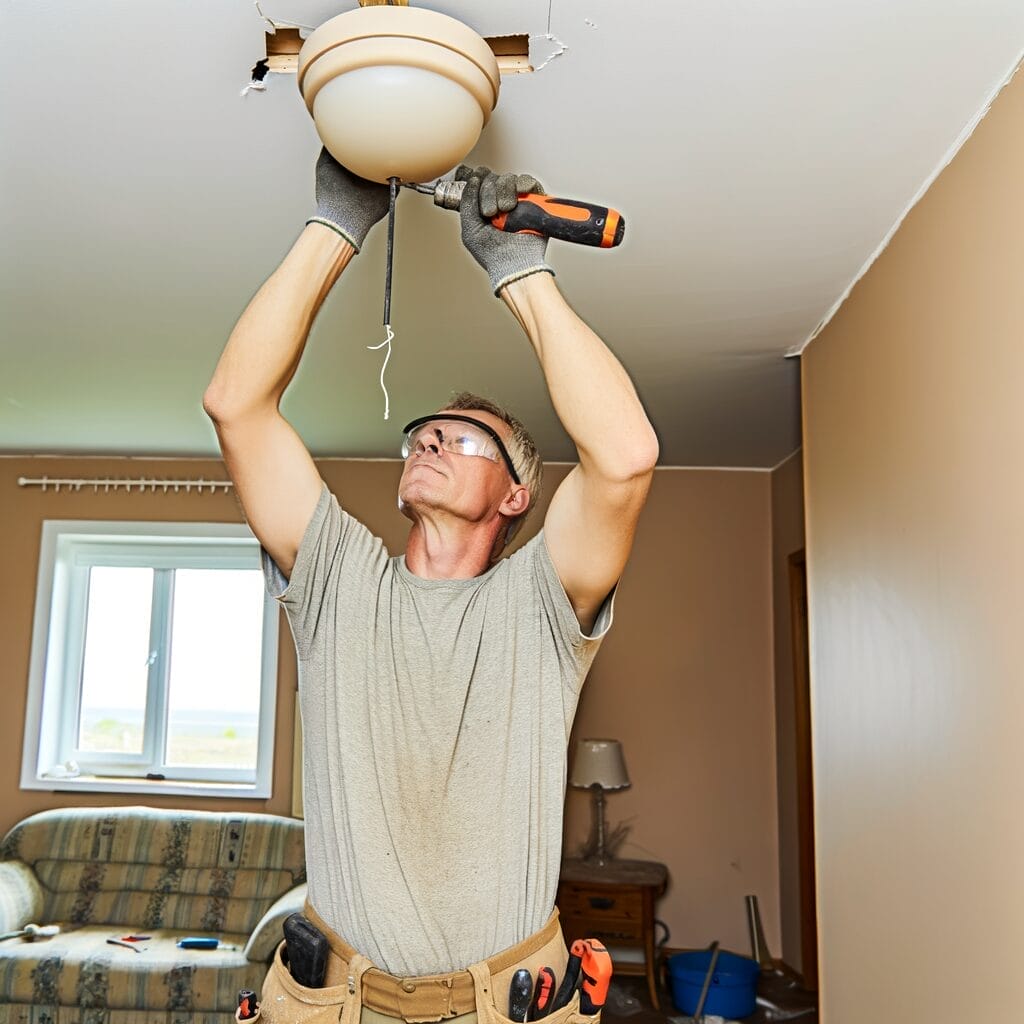
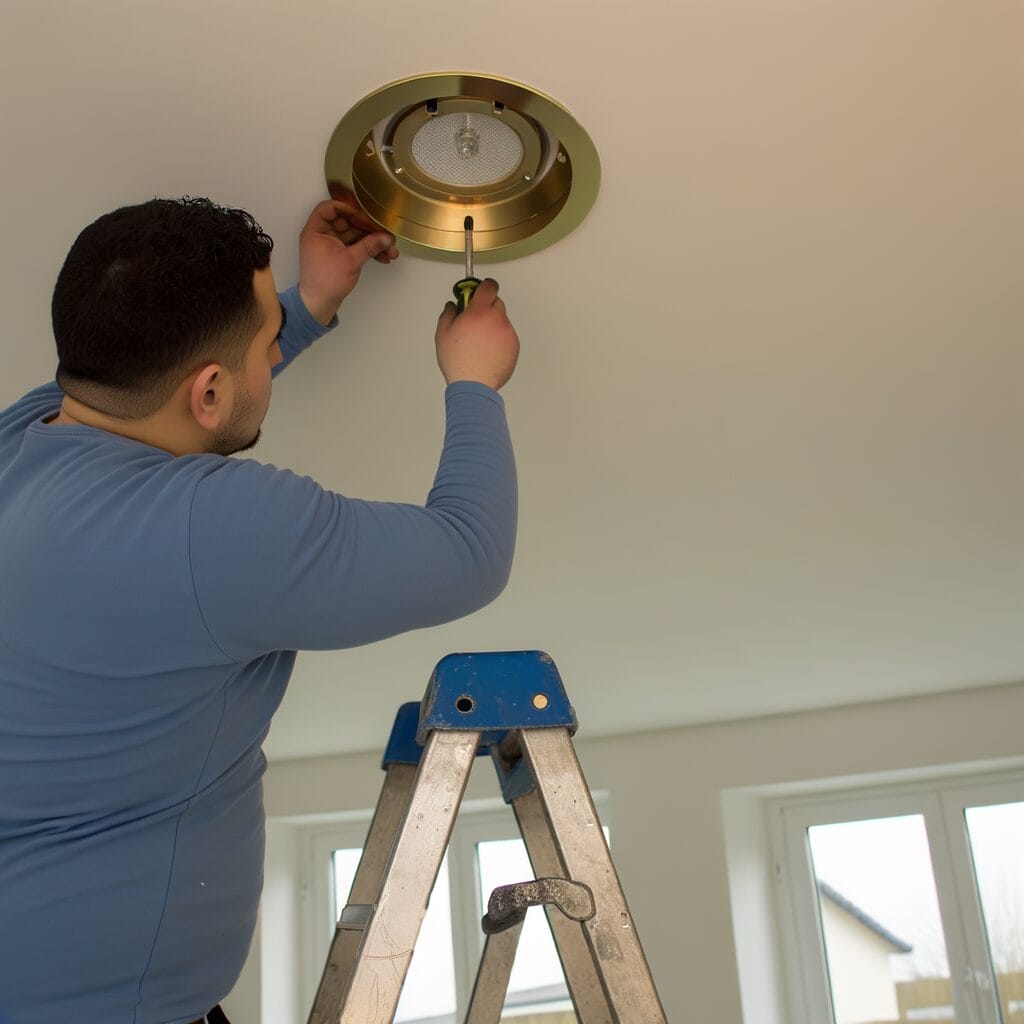
Step-by-Step Guide to Safely Remove a Nipple Light Fixture

The process for safely removing a nipple light fixture involves the following steps:
- Confirm the power to the light fixture is turned off at the circuit breaker.
- Use a voltage tester to verify it’s safe to proceed.
- Carefully remove any screws or fasteners holding the fixture in place.
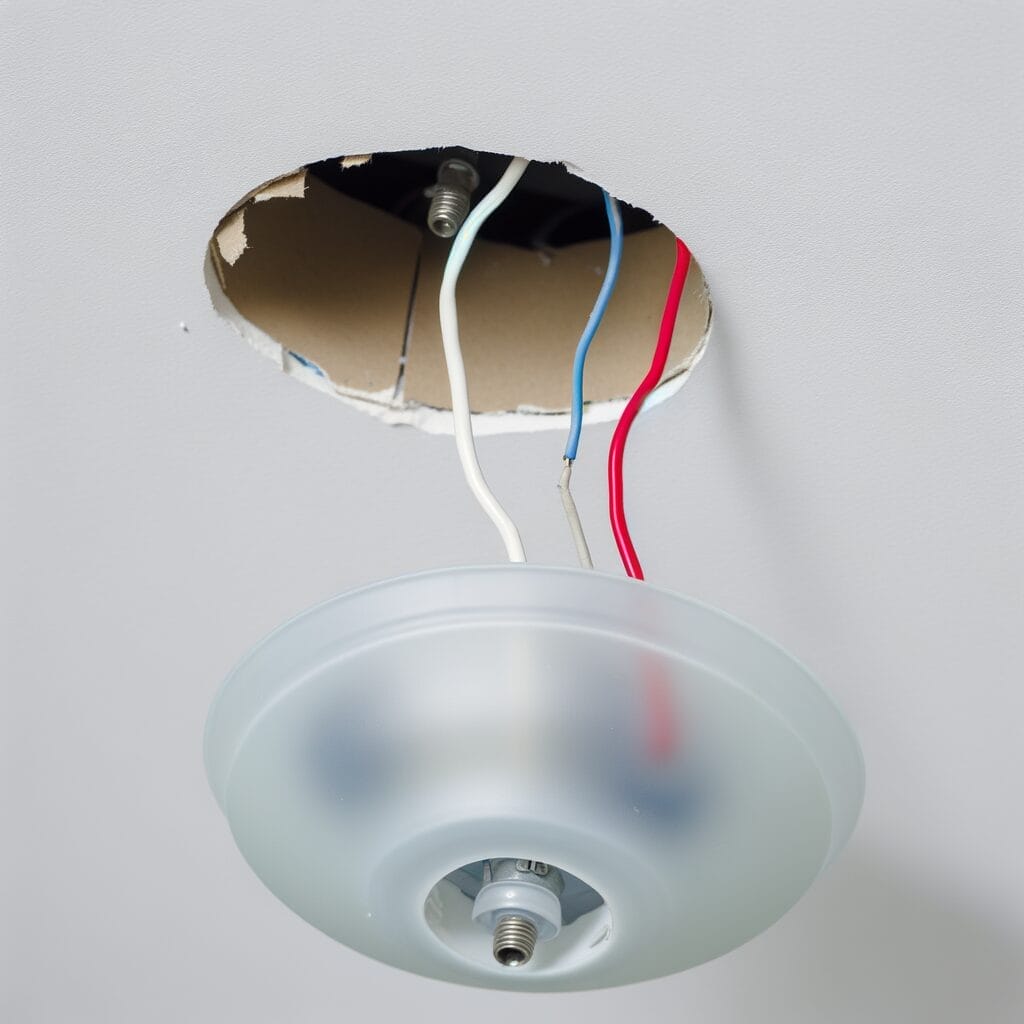
- Once the fixture is loose, gently lower it from the ceiling, being cautious not to damage the wires connected to it.
- Untwist the wire connectors and carefully separate the wires.
- After the wires are disconnected, remove the fixture completely. Safely set aside the fixture for proper disposal or potential reuse.
What to Do With the Removed Nipple Light Fixture
After removing the nipple light fixture, dispose of it safely or recycle it to maintain a tidy space. Cleaning the area where the fixture was removed is crucial for aesthetics. Additionally, inspect the ceiling area thoroughly for any damages or underlying issues that may need attention before installing a new fixture.
Consider the following actions to ensure a smooth shift after removing the nipple light fixture:
- Dispose of the old fixture responsibly: Look for local recycling centers or electronic waste disposal facilities to properly discard the old fixture.
- Organize unused parts: If any components of the fixture are still usable, consider storing them in an organized manner for future projects or repairs.
- Clean the surrounding area: Wipe down the ceiling and surrounding walls to remove any dust or debris left behind from the removal process.
- Inspect for any wiring issues: Check the electrical connections in the ceiling to guarantee safety and address any wiring concerns promptly.
Installing a New Light Fixture Instead of a Nipple Light Fixture
The next step after removing the old nipple light fixture is to select a new light fixture that complements the space. After deciding on the perfect fixture, start the installation process. Follow the manufacturer’s instructions, turn off the power to the room at the circuit breaker, remove the old mounting bracket, and attach the new one.
Connect the wires from the fixture to the corresponding wires in the ceiling, ensuring a secure connection with wire nuts. Once the wiring is complete, securely mount the new light fixture to the ceiling. Finally, turn the power back on and enjoy your newly installed light fixture.
Conclusion
To wrap up, removing a nipple light fixture can be a simple DIY home improvement project with the right tools and knowledge.
By understanding the anatomy of the fixture, making necessary preparations, and following a step-by-step guide, you can safely remove the fixture and install a new one if desired.
Don’t be afraid to tackle this project yourself and give your space a fresh new look with a new light fixture.
Frequently Asked Questions
Can I replace a boob light with a recessed light fixture?
Yes, you can replace a boob light with a recessed light fixture by following the appropriate steps.
How do I remove a boob light fixture from my hallway?
To remove a boob light fixture from your hallway, first turn off the power, then unscrew the fixture and detach the wires before installing the new fixture.
Is it easy to replace a boob light with a new fixture?
Yes, replacing a boob light with a new fixture is a DIY task that can be done easily with the right tools and guidance.
Can I change the wires of the old boob light fixture myself?
It is possible to change the wires of the old boob light fixture yourself, but make sure to turn off the power before attempting any electrical work.
What steps should I follow to replace a boob light with a new fixture?
To replace a boob light with a new fixture, you need to turn off the power, remove the old fixture, disconnect the wires, and install the new fixture following the instructions provided.